All Who Hate Lower Back Pain Say, "Ouch!": 6 Exercises To Prevent It
Experiencing lower back spasms or pain can really put a damper on your training. Actually, it can really put a damper on life in general!
Lower back pain makes dynamic movements like lifting, carrying, and getting up/down uncomfortable.
Even if you aren’t moving, pain is constant: sitting and lying down is uncomfortable, too. This compromises your sleep, causes distractions and irritability at work, even a simple action like coughing feels like a punch to the gut…
GUHHH, lower back pain flat out sucks.
Luckily, we have some movements that can help you avoid lower back pain! Praise BE!
Some of these movements can help alleviate back pain when it happens. But I highly recommend being proactive. Incorporate these movements into your workouts to strengthen your core, lower back, and gluteus muscle. Underactive and tight muscles that attach to your lower back region are most likely the culprits for this type of pain.
Tight hips and glutes can pull on your pelvis.
A weak core can also cause your hip flexors to overcompensate, which pulls your pelvis in a different direction.
And, aye caramba, all of this results in a painful muscular imbalance!
Poor posture can add stress to your muscles, ligaments, and tendons. But correcting poor posture and holding your spine in the proper position requires strong muscles.
These are the movements you need to strength those muscles!
Movement #1: Glute Bridges

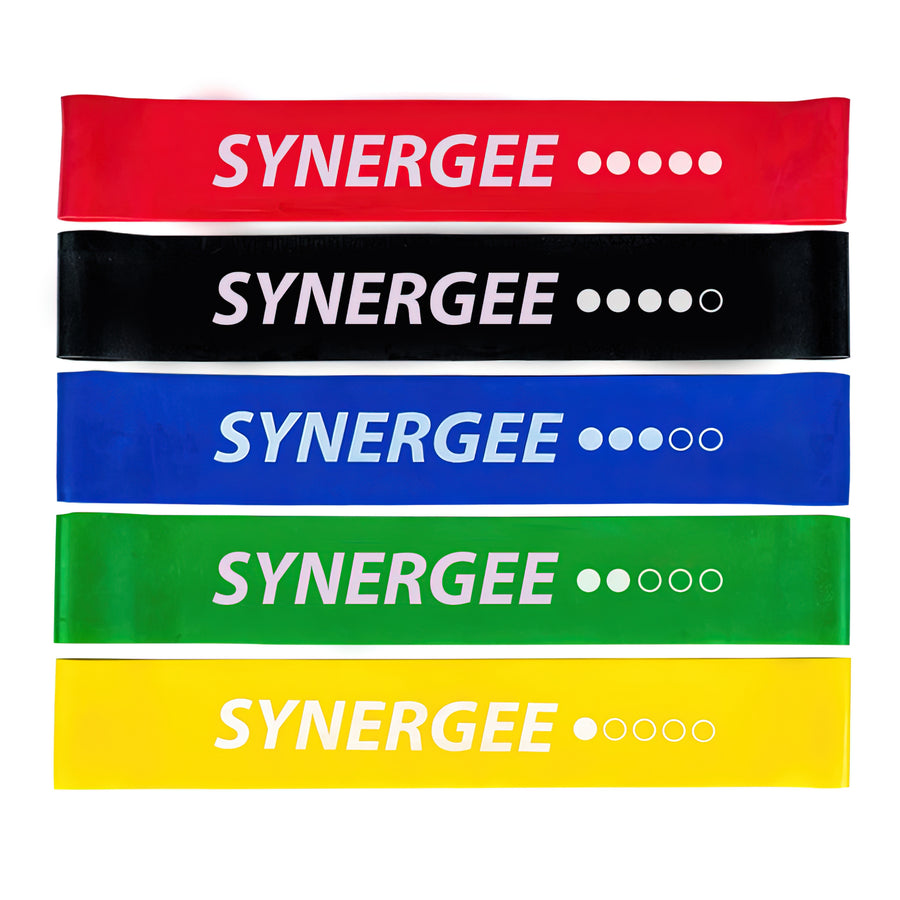
- Place your Mini Band just above your knees.
- Lie on your back with your hands at your sides, knees bent, and feet flat on floor hip-width apart.
- Squeeze your glutes and abs. Then, lift your hips off the floor until a a straight line is created from your knees to your shoulders.
- Hold the bridge, fighting the urge to let your knees come together exerted by the mini band.
- Slowly let your hips lower to start.
Complete 3 sets of 10-15 reps
Movement #2: Clam Shells

- Place your Mini Band just above your knees
- Lie on your side. Prop yourself onto your elbow and stack your legs & feet on top of one another. Bend your knees so they are just in front of your body
- Pull your top knee away from your bottom by rotating your hip outwards. You can steady yourself by placing your hand on the ground in front of you or by your side.
- Hold for a second at the top. Lower back down to start.
Complete 3 sets of 10-15 reps per side.
Movement #3: Good Mornings


This movement can be completed with any Barbell (Open, Regional, Games, or Rhino), Fixed Barbell, Weighted Workout Bar, or it can be done with our Power Bands or Bodyweight.
- Place your barbell on your back. Stand up straight, brace your core and pull your shoulders back. Holding this position, there should be tension on the bar as you pull it into your shoulders.
- Take a breath in. Keeping your shoulders back, start to hinge forward from your hip. Your back will remain flat and your legs can have a very slight bend in the knee.
- Let your chest come down as you push your hips back until you feel a stretch in your hamstrings. You don’t have to strain to keep your eyes looking forward; keep a neutral gaze.
- Do not let your back go any lower than parallel with the floor. Push your hips forward and bring your chest up to return to start. Exhale as you come up from this movement.
NOTE: This movement must be done with proper form. Start with low weights and go slow.
Complete 3 sets of 10 reps.
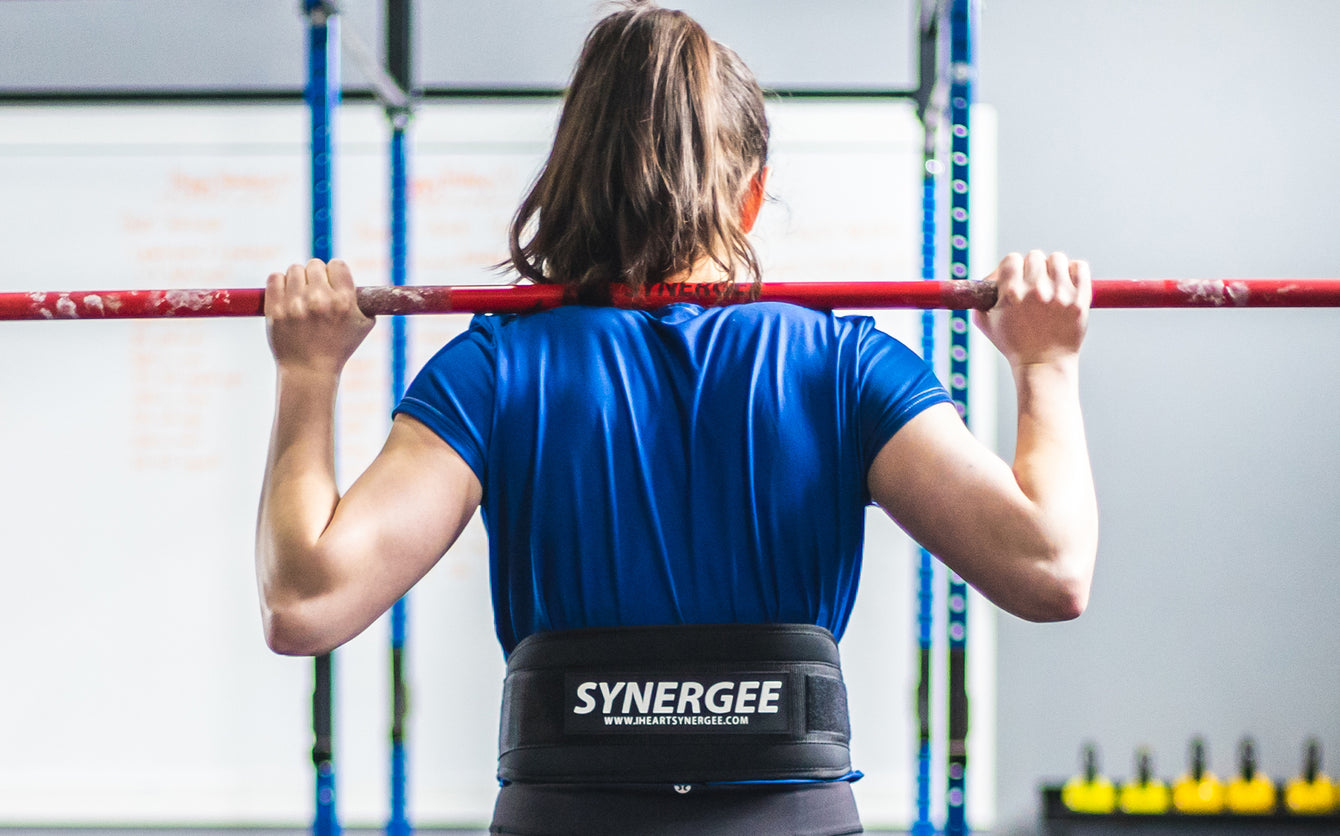
Movement #4: Squats/Deadlifts with a Belt

Weight Belts can be used during heavy power lifts to cue your body to brace and hold tight under the weight!
When you use a belt during your lifting sessions, it aids you in cushioning and stabilizing your spine with intra-abdominal pressure.
Note – the belt shouldn’t be used as a crutch. It will not correct a weak core or lumbar spine. But it can encourage you to recruit the right muscles when you are lifting!
- Wrap a measuring tape around your waist just below your ribcage. This is where your Synergee Weight Belt will sit when properly fitted. Hold onto the end of the measuring tape (the one starting at 0) and pinch it against the other side of the tape that has wrapped around your body to get the measurement.
- You will want your belt to fit tight, so pull the measuring tape in close and take a quick breath in, like you would before a heavy lift. This will give you the most accurate reading.
- Find the size on our Weight Belt Page that corresponds to your waist size. NOTE: Using your regular pant waist size or going off your regular clothing size will result in you ordering the wrong sized belt.
Movement #5: Partial Curls

- Get out your Synergee Core Mat. Sit on the ground and place the ab mat against your butt. Lie back on it.
- You can bend your knees so your feet are flat on the floor or put your legs in the butterfly position. Place your hands behind your head or cross them over your chest.
- Pull your belly button towards your spine as you take a deep breath.
- Lift your shoulders off the ground a few inches. Avoid pulling up with your neck.
- Return to start position.
Complete 3 sets of 10 reps.
Movement #6: Move more throughout the workday

This one isn’t a movement, per se… but weak glutes and core (and subsequently, back pain) are becoming more common because more people are sitting all day at work.
Set a timer for an hour and throughout the day, when it goes off, get up and move.
Even if it’s a walk to the bathroom or the sink to refill your water bottle – get up, move, you can even do some twists along the way. When you sit back down, remember to sit up straight.
You can start your lunch break with a walk. It sounds silly, but squeezing your glutes throughout the day, performing seated straight-leg raises, calf raises, toe taps, and shoulder shrugs & retractions can help, too!
Breaking the habit of slouching at your desk all day like a wet noodle will do wonders for your back!
A quick fix can also include putting a Yoga Ring behind your back to making your chair more ergonomic! Perhaps you can also find some time to do some couch stretches with it, too!
Dem Bones, Dem Dry Bones
Your thigh bone is connected to your hip bone… your hip bone is connected to your back bone…
Keep them all happy and singing in unison – rather than crying in pain – by adding these movements to your regular gym programming!
How do you keep your lower back healthy and happy? Let us know in the comments!


Recent Articles